MatchID
Drop headshots into MatchID
People & Facial Recognition
Manage your athlete database, headshots, and reference photos for GalleryID MatchID.
Your Biometric Data Responsibilities
GalleryID acts as a data processor only. When you upload headshots and enable facial recognition, you are the data controller. That means you are responsible for compliance with biometric privacy laws in your jurisdiction, not GalleryID.
Facial recognition works by generating a mathematical representation (a “face embedding”) from each headshot. Under laws like Illinois BIPA, Texas CUBI, Washington RCW 19.375, CCPA/CPRA, and GDPR, this data may be classified as biometric data with specific legal requirements.
Before uploading headshots, you should:
- Determine which biometric privacy laws apply to your organization and the individuals in your photos
- Provide written notice to athletes (or parents/guardians for minors) that their facial geometry will be captured and processed
- Obtain informed, written consent where required by applicable law
- Keep records of all notices and consents, GalleryID may request these
Face embeddings are deleted immediately when you remove a person from your roster. All biometric data is purged within 30 days of account deletion. GalleryID never uses your data to train AI models.
For full details, see the Terms of Service (Section 7), Data Processing Agreement, and Privacy Policy. GalleryID does not provide legal advice, consult a qualified attorney regarding your specific obligations.
The People Page
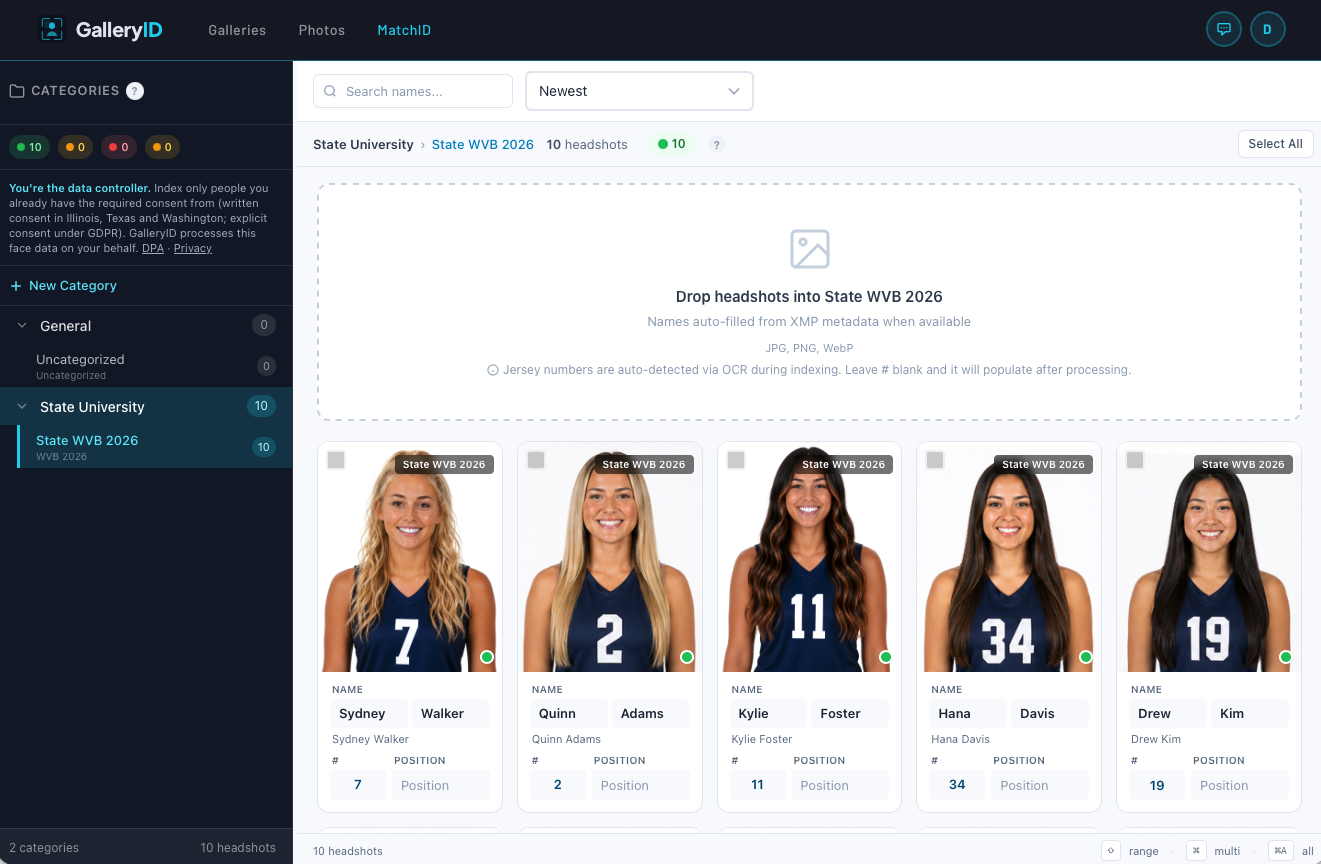
The People page uses a browser-style layout with a category sidebar on the left and a headshot grid on the right. Use the sidebar to filter by category, team, or index status, and the toolbar to search, sort, upload, and run bulk actions.
Category Sidebar
The left sidebar lists your categories and subcategories (teams) with headshot counts. Click a category to filter the grid. Drill into subcategories to see just one team. The sidebar also shows status shortcuts to filter by Indexed, Pending, or Failed.
Right-click a category or subcategory in the sidebar to rename or delete it. On desktop, drag the vertical handle between the sidebar and the grid to resize. On mobile, tap the menu icon to slide the sidebar open.
Toolbar


The toolbar across the top of the grid provides:
- •Add Person, opens the upload modal to add one or more new people.
- •Search, type a name to filter headshots across all categories.
- •Sort, switch between newest first, alphabetical, or jersey number.
- •Grid / List view toggle, choose your preferred layout.
- •Thumbnail size slider, adjust card size in grid view.
- •Select All / Deselect, toggle selection of all visible headshots.
Selecting Headshots
Selection works the same way as the Photo Browser:
| Action | How |
|---|---|
| Select one | Click a headshot card |
| Add / remove from selection | Cmd / Ctrl + click |
| Select a range | Click first, then Shift + click last |
| Select all | Cmd / Ctrl + A, or click "Select All" in the toolbar |
| Clear selection | Press Escape, or click "Deselect" |
Bulk Actions
With one or more headshots selected, the toolbar shows bulk action buttons:
- •Move to Category, reassign selected people to a different category and team.
- •Delete, permanently remove selected people, their reference photos, and all match history.
Adding People
Upload Panel
Click "+ Add Headshots" to open the upload panel on the right side of the screen. The panel walks you through a three-step flow:
- 1
Select Category & Subcategory
Choose the category and subcategory (team) these headshots belong to. You can also create a new category or subcategory inline, including setting a Display Name for photo tags. This selection pre-fills each headshot you add in the next step. - 2
Add Photos
Click to select files or drag-and-drop images. The panel accepts JPEG, PNG, and WebP. You can add multiple files at once, each becomes a separate person entry. If the images contain XMP metadata (PersonInImage), names are auto-filled. - 3
Review & Submit
Each headshot shows its preview, auto-filled name, and the category/subcategory you chose in Step 1. Edit names, jersey numbers, positions, or reassign individual photos to a different category or subcategory if needed, then click Upload. The system uploads each headshot, detects the face, and generates a face embedding. Status updates from "Pending" to "Indexed" shortly after.
Bulk Import by Folder
Drag an entire folder of headshot images onto the upload area. The system reads each filename as the athlete name (e.g., Tyler_Brooks.jpg → "Tyler Brooks"). Review and correct names on the confirm step before uploading.
Reference Photos
Reference photos improve facial matching accuracy by giving the AI multiple angles and conditions to compare against. A single headshot works well in controlled settings, but sports photography introduces helmets, sunglasses, motion blur, and extreme angles. Adding reference photos helps the system recognize athletes even when their face is partially obscured.
Why Reference Photos Matter
| Scenario | Without Reference | With Reference |
|---|---|---|
| Helmet-on (football) | Low match confidence | Significantly improved |
| Sideline / celebration | Moderate confidence | High confidence |
| Sunglasses / visor | Often missed entirely | Detectable with reference |
| Profile / side angle | Poor match rate | Significantly improved |
Adding Reference Photos
There are two ways to add references, from the People page or directly from gallery photos during review.
Method 1: From the People page
- 1
Open View Details
Click the three-dot menu (⋮) on any person card and select "View Details". - 2
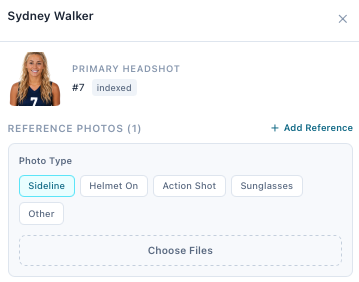
Click "+ Add Reference"
In the Reference Photos section at the bottom of the modal, click the button. - 3
Choose a photo type
Select the condition: Helmet On, Sideline, Action Shot, Sunglasses, or Other. Adding a reference from inside a gallery instead offers a Headshot option as well; this panel does not. - 4
Upload photos
Click "Choose Photos" to select images. You can upload multiple at once, they all get tagged with the selected type. - 5
Wait for indexing
Each photo is automatically processed for face detection and embedding. The status changes from "Pending" to "Indexed" shortly after.
Method 2: From gallery photos during review
While reviewing photos in the Gallery Browser, you can turn any gallery photo into a reference, no file upload needed. This is ideal when you spot a clear shot of an athlete during your normal review workflow.
- 1
Click "+ Add as Reference Photo"
Below each photo card's tag input, click the link to open the reference modal. - 2
Select face and person
Pick which detected face to use (if multiple), then search for and select the person. - 3
Choose photo type and confirm
Classify the reference type and click "Add Reference".
Recommended Reference Photo Types
| Type | Best For | Priority |
|---|---|---|
| Helmet On | Football, lacrosse, hockey, face partially covered | High |
| Sideline | Bench, warmup, celebration, natural angles | Medium |
| Sunglasses | Baseball, outdoor sports with eyewear | Medium |
| Action Shot | Game photo where the athlete is clearly identifiable | Low |
| Other | Any other useful angle or condition | Low |
How Reference Matching Works
When a gallery is processed for facial recognition, the AI compares each detected face against all indexed embeddings, both the primary headshot and any reference photos. The system uses whichever reference produces the highest similarity score. This means adding a helmet-on photo for a football player lets the AI compare helmet-on game photos against a helmet-on reference, which is far more accurate than comparing against a bare-face headshot.
- •Each reference photo generates an independent face embedding.
- •During matching, all embeddings for a person are searched simultaneously.
- •The highest similarity score across all references is used.
- •Reference photos supplement the primary headshot, they don't replace it.
- •You can add as many reference photos as needed per person.
The one-click route, and what it assumes
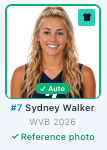
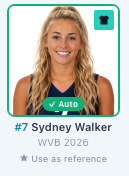
Inside a photo, a tagged person's row has a Use as referencetoggle. It is the fastest way to add one, and it files the reference as Action without asking. If the condition matters, a helmet shot, sunglasses, add it from the panel here or from the gallery's full reference dialog so you can set the type yourself.
Managing References
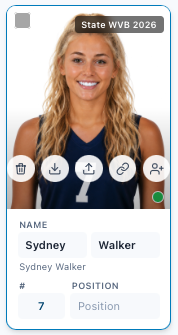
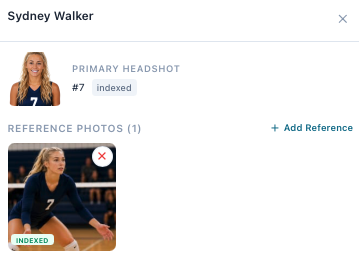
- •View all references in the person's View Details modal.
- •Each reference shows its type badge (Helmet On, Sideline, etc.) and index status.
- •Hover over a reference and click ✕ to remove it from matching.
- •Removing a reference deactivates it, the image file is preserved in storage.
Index Status
| Status | Meaning |
|---|---|
| Indexed | Ready to match. A face was found and stored for this person. |
| Linked | This row is the same human as another row you already indexed, a returning athlete with a row per season. It matches through the row it is linked to. |
| Pending | Uploaded, waiting its turn. |
| Processing | Running now. Usually a few seconds. |
| Failed | No face was found. Try a clearer photo with the face fully visible. |
Categories & Teams
Each person belongs to a category (e.g., "Cal Athletics") and a subcategory / team (e.g., "Football"). This structure enables roster-scoped matching, when a gallery is scoped to specific teams, only people on those teams are searched during facial recognition.
Managing Categories
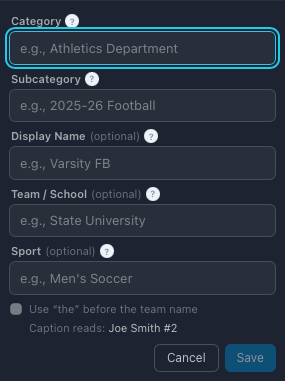
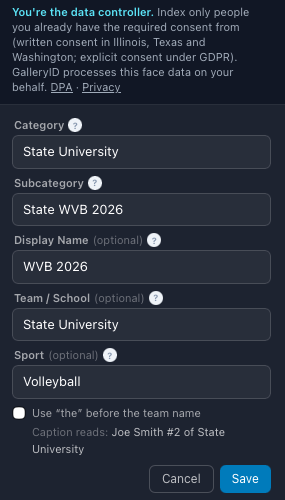
Categories and subcategories are managed from the Organization dashboard under "Face Categories." Everything is edited inline, no pop-ups required:
- •Click the edit icon on a category row to rename it inline.
- •Click the + icon on a category row to add a new subcategory with a name and optional Display Name.
- •Click the edit icon on a subcategory row to change its name or Display Name inline.
- •Click the trash icon to delete, a confirmation dialog will appear.
- •New categories (with an optional first subcategory) can be added at the top of the list.
- •Categories and teams also appear in the left sidebar of the People page for quick filtering.
- •A "General" category is created automatically if none exists.
How scoping works
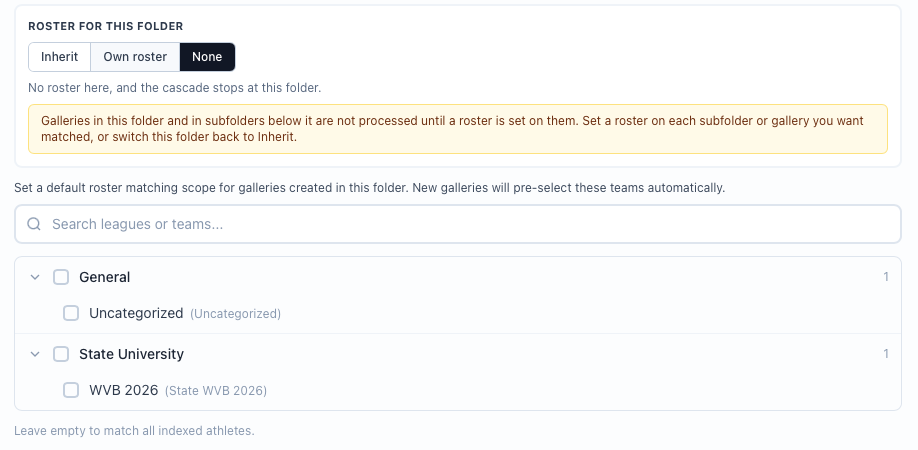
A subcategory is what you assign to a gallery. When creating or editing one you can select one or more subcategory scopes, and during processing only people in those subcategories are searched.
- •Scoped galleries get better jersey-only matching, because there is less ambiguity about who a number belongs to.
- •Unscoped galleries search each indexed headshot in the organization.
- •Recognition Mode defaults to Scoped. Inside it, a gallery with no teams picked matches all indexed athletes, unless its folder is set to None, in which case it is not processed until a roster is set.
Display Names
Each subcategory has an optional Display Name. When set, the Display Name is what appears on photo tags, badges in the gallery browser, and the photo edit modal, instead of the subcategory name. This is useful when subcategory names are technical (e.g., "2025-26") but you want a friendlier label on photos (e.g., "Cal Football"). If no Display Name is set, the subcategory name is used everywhere.
Roster Matching in Galleries
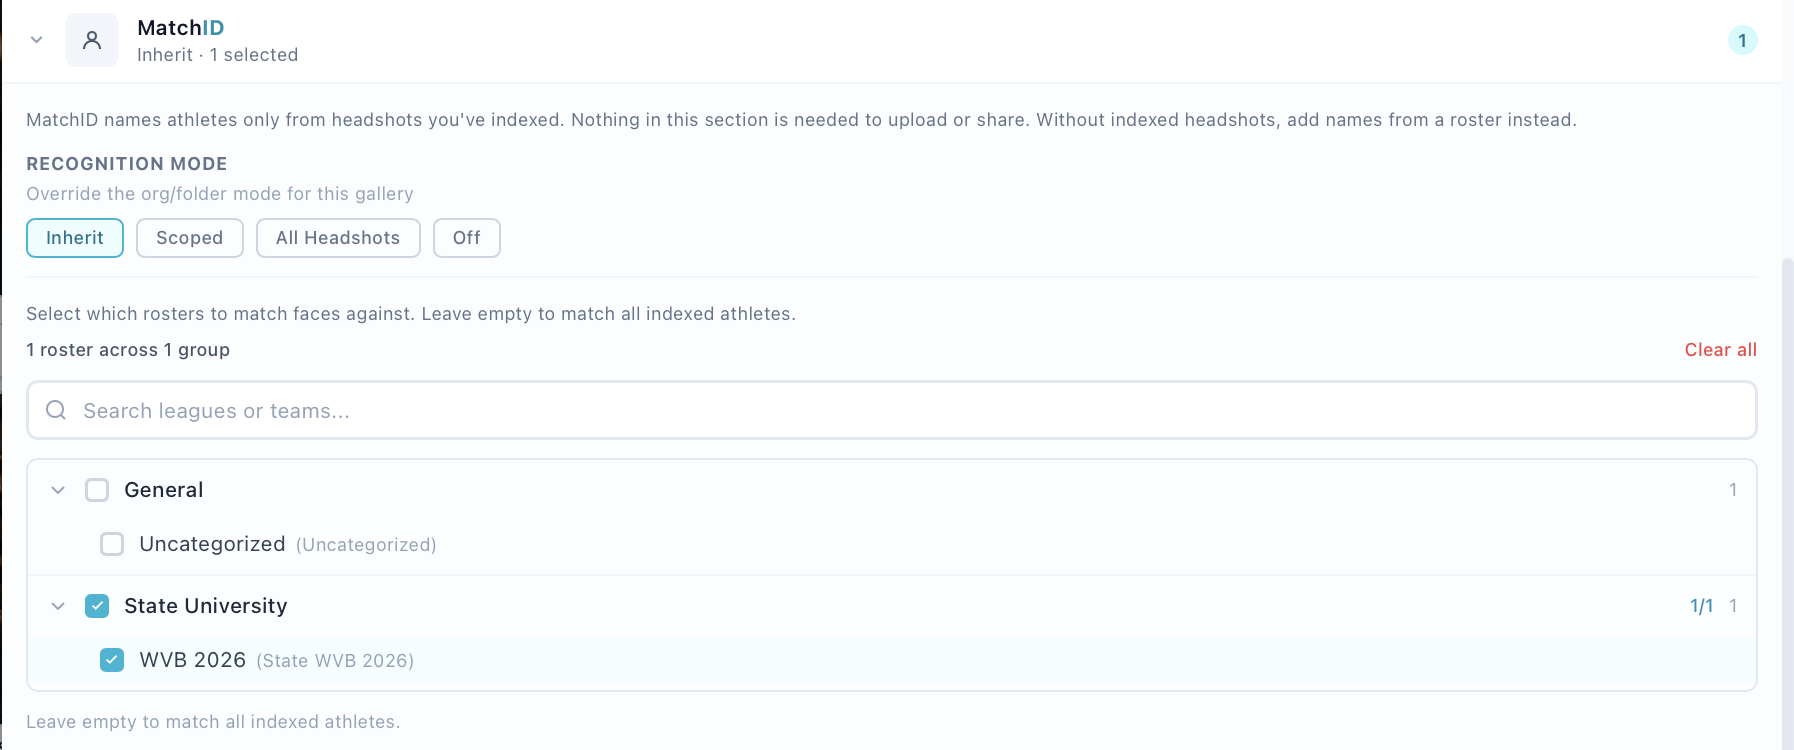
When you assign teams to a gallery (in Gallery Browser → gallery settings), facial recognition only searches athletes from those teams. This keeps results focused, a football gallery won't try to match against basketball players, and vice versa.
Editing & Managing People
Click the three-dot menu (⋮) on any headshot card to access these actions:
| Action | What It Does |
|---|---|
| View Details | Opens the full detail modal with headshot, info, and reference photos. |
| Edit | Change name, jersey number, position, or category/team assignment. |
| Re-index | Regenerates the face embedding, useful after uploading a better headshot. |
| Delete | Permanently removes the person, their references, and all match history. |
Keyboard Shortcuts
| Key | Action |
|---|---|
| Cmd / Ctrl + A | Select all visible headshots |
| Escape | Clear selection |
| Cmd / Ctrl + click | Add or remove a headshot from the selection |
| Shift + click | Select a range of headshots |
Troubleshooting
| Issue | What to Check |
|---|---|
| Headshot stuck on "Pending" | The indexing queue may be processing other items. Wait a minute and refresh. If it persists, try re-indexing from the three-dot menu. |
| Index status shows "Failed" | The system could not detect a face in the image. Upload a different photo with the face clearly visible, front-facing, and well-lit. |
| Person not appearing in gallery matches | Check that the person is "Indexed" and assigned to a team that is scoped to the gallery. Un-scoped galleries search all teams. |
| Reference photo not improving matches | Make sure the reference status is "Indexed". Also verify the photo type matches the condition you're trying to improve (e.g., Helmet On for football). |
| Categories or teams missing | Categories load from the sidebar. If the sidebar is empty, refresh the page. Contact support if the issue persists. |
Related