Galleries and photos
Organize galleries with folders
Gallery Browser
Navigate folders, browse galleries, manage your photo library, and review MatchID matches.
Browser Layout
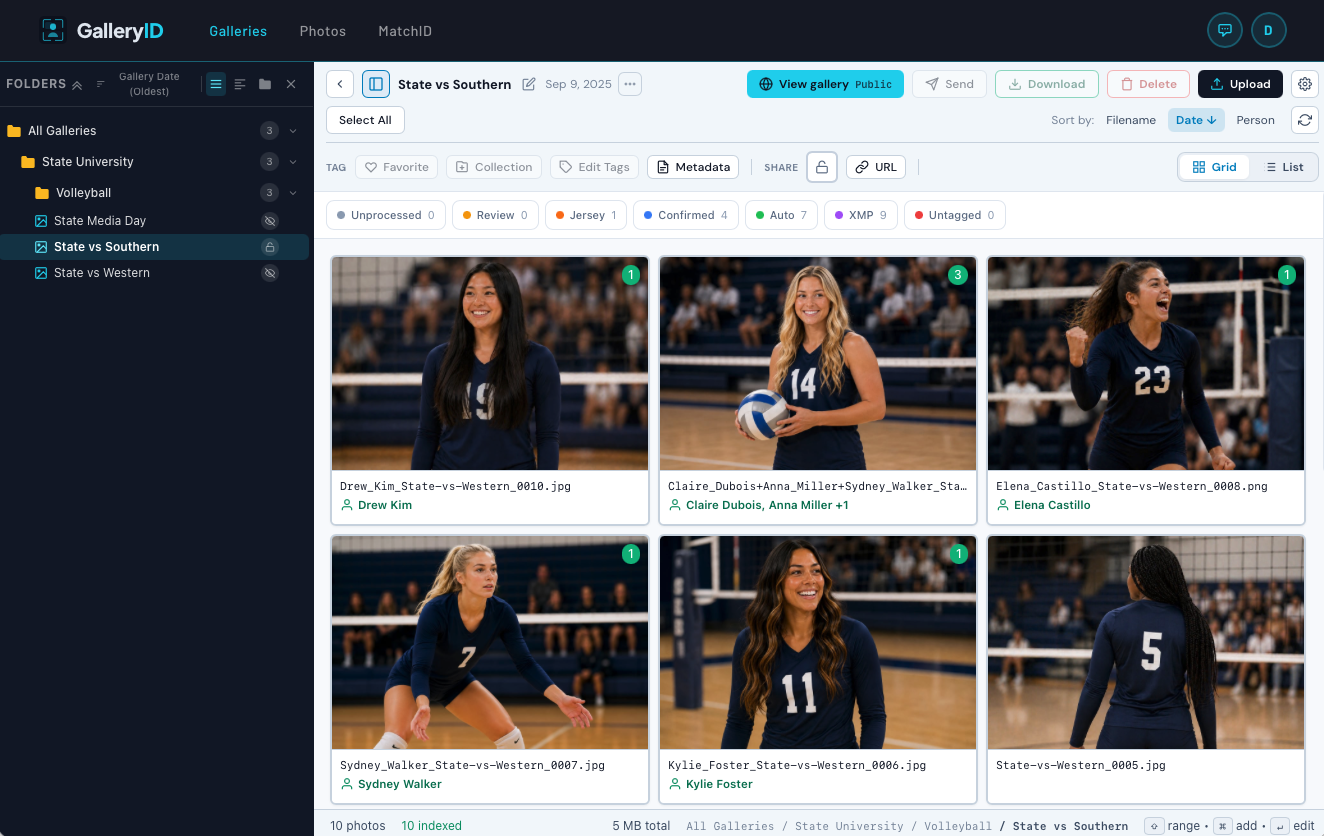
The Gallery Browser is your main workspace. It features a folder tree sidebar on the left and a gallery grid on the right. The top toolbar provides quick access to actions, view controls, and sorting.
Toolbar

The toolbar at the top of the browser is icon-only on desktop. Hover any button to see the label. Visible buttons change based on whether you're viewing a folder or a gallery, and your capabilities on the current resource.
Action Buttons (Gallery view)
| Icon | Action | Notes |
|---|---|---|
| Upload | Open the upload modal | Hidden if you lack upload on this gallery |
| Tag | Edit metadata on selected photos | Gated on edit_tags |
| Download | Pick a size; download fires on selection | Single-click pattern: choosing a size starts the download immediately |
| FTP | Send selected photos to a configured FTP destination | Gated on export. Requires FTP feature |
| Globe / Shield / Lock | Visibility quick-toggle | Click to open a dropdown and switch between Public, Password, Private without opening the Settings modal |
| Copy URL | Copy the gallery URL to your clipboard | Always available on a gallery |
| Settings cog | Open the gallery Settings modal | Gated on settings cap |
| Trash | Delete selected items | Gated on delete |
| People Search | Search for a person across galleries | Always visible |
| Person Filter | Filter photos by person inside this gallery | Always visible inside a gallery |
Sort, Search, View

- •Sort: the Sort button always reads "Sort" and opens a dropdown of fields. The button label doesn't change with the active sort.
- •Search: icon-only on desktop. Click it to expand a search input above the grid.
- •Grid View: justified photo layout with hover overlays showing preview, edit, and menu buttons. Photos display person names, face count badges, and pending match indicators.
- •List View: compact horizontal rows showing thumbnail, filename, people, face count, file size, and date.
- •Select All / Deselect All: toggle button for bulk selection. Combine with Shift+click for range selection or Ctrl/Cmd+click to toggle individual items.
Mobile Toolbar
On narrow screens the row collapses to a few primary icons plus an overflow menu. The overflow menu contains Settings, a Visibility submenu, Copy URL, Search, and other actions. Re-Index isn't in the mobile menu either; open Settings → MatchID to run it.
Breadcrumb Row
Above the toolbar, the breadcrumb shows your path through folders and into a gallery. On a gallery, a small pencil next to the title lets you rename inline. The indexed-photo count moved out of the breadcrumb and into the footer below the grid.
Sidebar
The left sidebar shows your folder hierarchy and provides search, sorting, and quick creation tools.
Search & Sort
- •Search: type in the search box to live-filter galleries and folders by name. Case-insensitive, matches as you type.
- •Sort: use the dropdown to sort the sidebar tree by Name A-Z, Name Z-A, Newest First, or Oldest First.
- •Quick Create: the "+" buttons next to the search box let you create a new gallery or folder without right-clicking.
Folder Tree
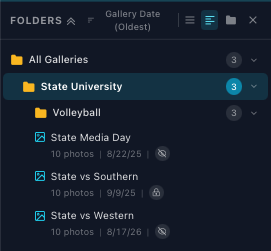
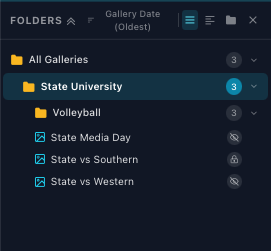
Folders can be nested to organize galleries by sport, season, or any structure you prefer.
- •Click a folder to view its galleries
- •Click the arrow to expand/collapse subfolders
- •Each folder shows a badge with its gallery count (including subfolders)
- •Hover over a folder to reveal the 3-dot menu for quick actions
- •"All Galleries" shows each gallery across all folders
Folder Context Menu
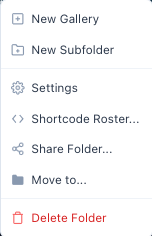
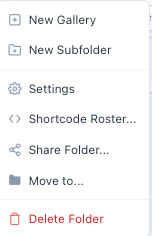
Right-click any folder in the sidebar for these actions:
- •New Gallery: create a gallery inside this folder
- •New Subfolder: create a nested folder
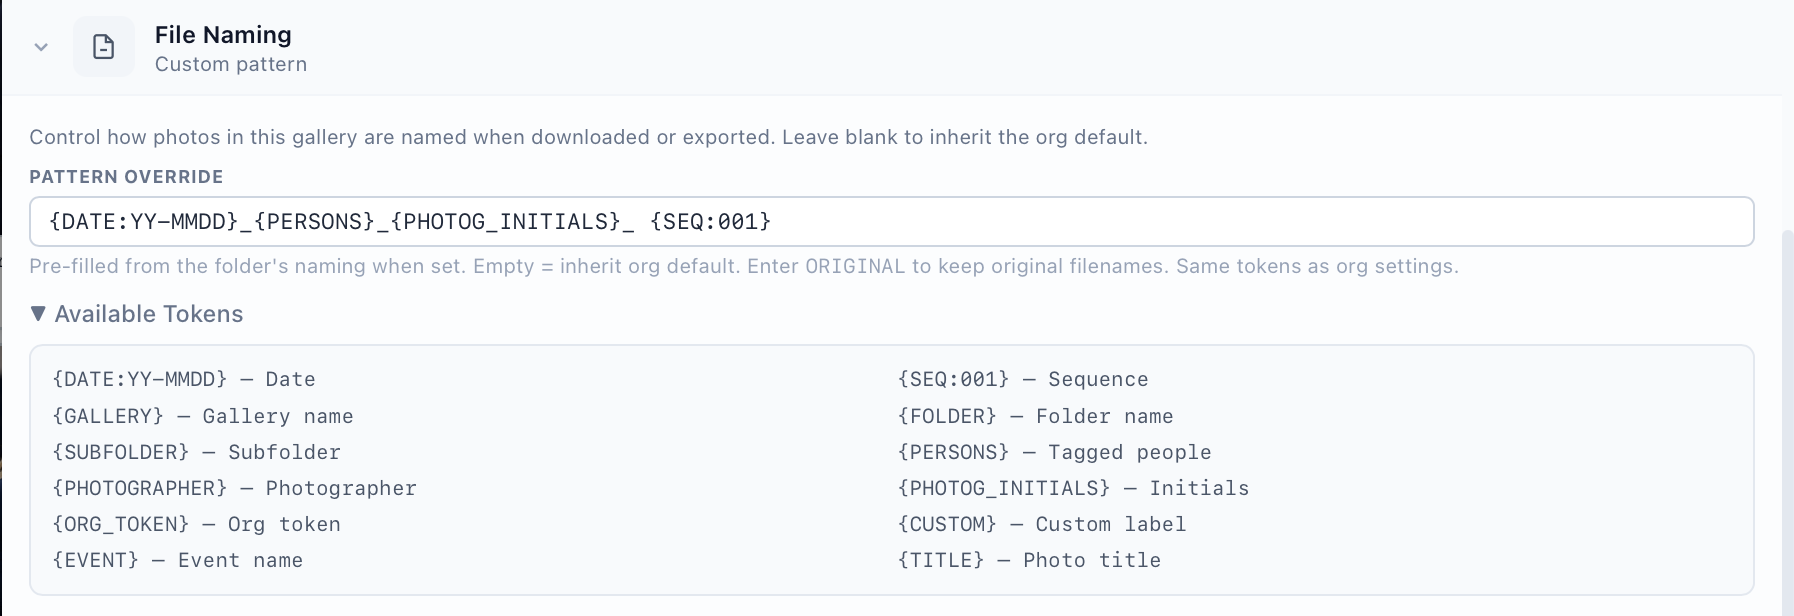
- •Settings: the defaults each gallery created inside this folder inherits, including MatchID rosters, file naming, permissions and notifications
- •Shortcode Roster...: opens that same Settings panel at its Shortcode Roster section. Shows only when CaptionID is enabled for your organization.
- •Share Folder...: one link to the whole folder. The link overrides each gallery's own visibility, so anyone who has it sees every gallery inside.
- •Move to...: move this folder somewhere else in the tree
- •Delete Folder: deletes the folder and everything nested inside it. You choose what happens to the galleries: move them to the root, or delete them too, which asks you to type Delete to confirm.
Gallery Context Menu
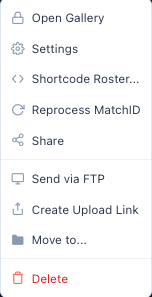
Right-click any gallery in the sidebar, or click the 3-dot menu (⋯) next to the gallery title, for these actions:
- •Open Gallery: opens the gallery's public page in a new tab with admin preview. The icon indicates visibility: globe (public), shield (password), or lock (private). Works for any gallery status, admins can preview unpublished and private galleries.
- •Settings: open the settings slide-out panel (details, folder, roster, sharing, permissions)
- •Share: open the sharing panel to generate share links
- •Send via FTP: export gallery to a configured FTP server
- •Create Upload Link: generate a shareable link so others can upload photos directly to this gallery
- •Move to...: move the gallery to a different folder
- •Delete Gallery: permanently remove the gallery and its photos
Resize & Collapse
Drag the sidebar edge to resize it, or click the toggle button at the bottom of the resize handle to snap it open or closed. Your sidebar width preference is saved automatically.
Drag & Drop
You can drag items onto folders in the sidebar to reorganize your library without opening menus.
- •Photos to Gallery: drag photos from the grid onto a gallery in the sidebar to add them
- •Photos to Folder: drag photos onto a folder to move them
- •Gallery to Folder: drag a gallery card onto a folder to move it
- •Folder to Folder: drag a folder onto another folder to nest it
- •Files from desktop: drag image files from your computer onto an empty gallery to upload them
Creating Folders
- 1Click the "+" icon next to the folder section header, or right-click an existing folder.
- 2Enter a folder name (e.g., "2025 Season", "Football").
- 3Choose a parent folder if creating a nested folder.
Gallery Cards
Each gallery is shown as a card with its cover photo, title, date, and stats. Cards display photo count (teal) and athlete count (green) at the bottom.
Gallery Status

| Status | Description |
|---|---|
| Draft | Not visible to viewers. Work in progress. |
| Processing | Photos are being processed by AI. |
| Published | Live and accessible based on visibility settings. |
| Archived | Hidden from browse, preserved for reference. |
Gallery Actions
Right-click any gallery card or use the ⋯ menu to access actions:
- •Edit: change title, date, description, settings
- •Share: generate a share link with visibility options
- •Move: move gallery to a different folder
- •Process Faces: trigger AI facial recognition
- •Publish / Unpublish: toggle gallery visibility
- •Archive / Delete: remove gallery from active view
Creating a Gallery
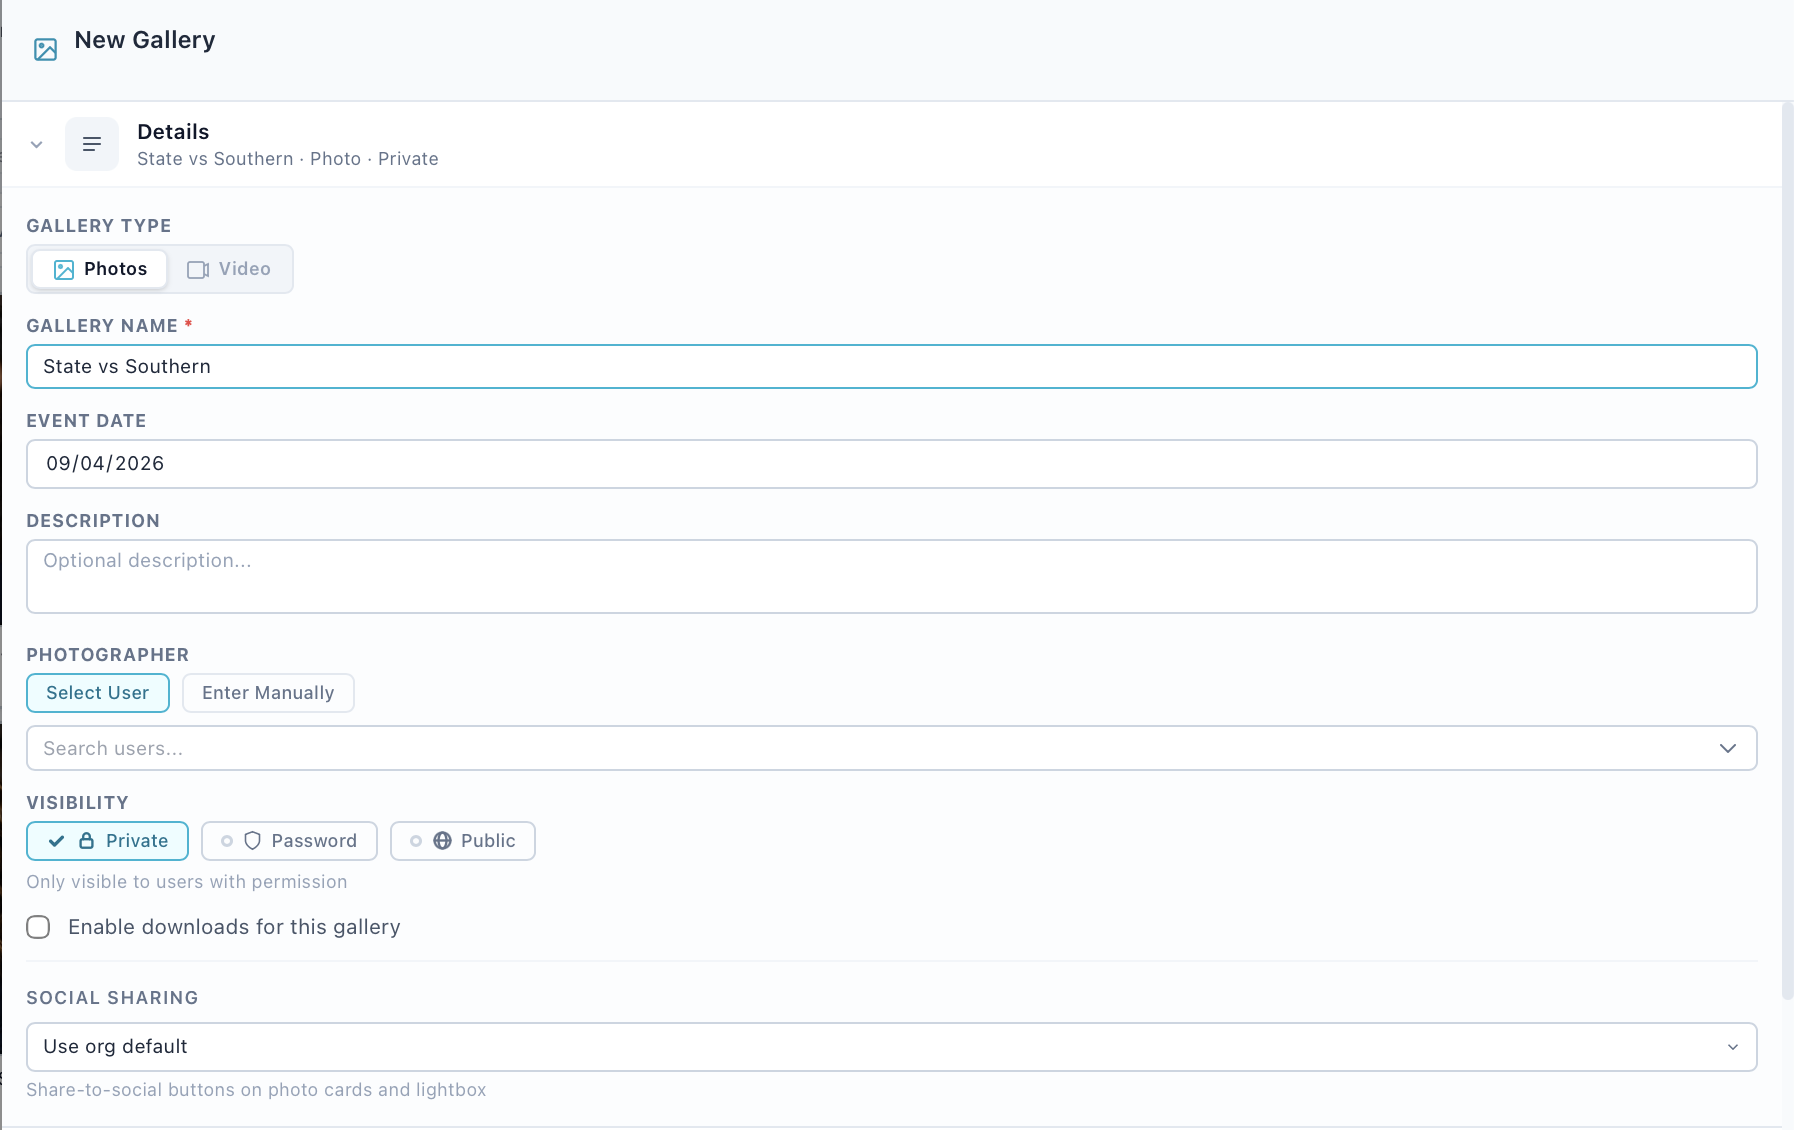
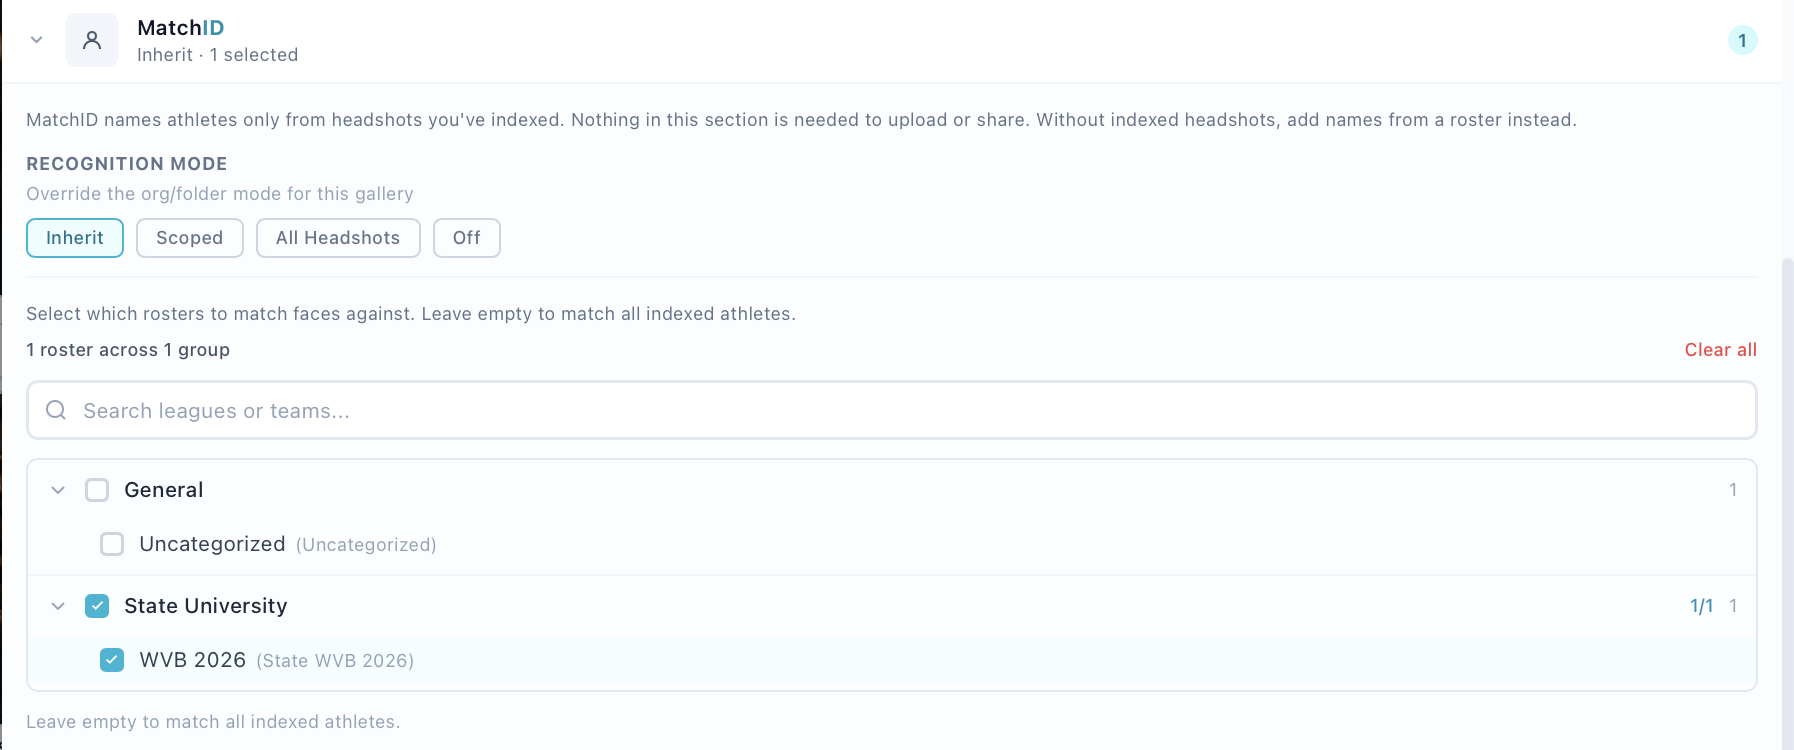
Four steps to get a gallery up and running:
- 1
Click New Gallery
Use the button in the toolbar or right-click a folder. - 2
Enter details
Fill in title, date, description, and select a folder. Set visibility to Private, Public, or Password-protected. - 3
Set roster matching
Choose which teams to match against for facial recognition. This controls which athletes appear in person search. - 4
Upload photos
Drag and drop photos or click to browse. Supports JPEG, PNG, and RAW formats (.cr2, .nef, .arw, etc.).
Roster Matching
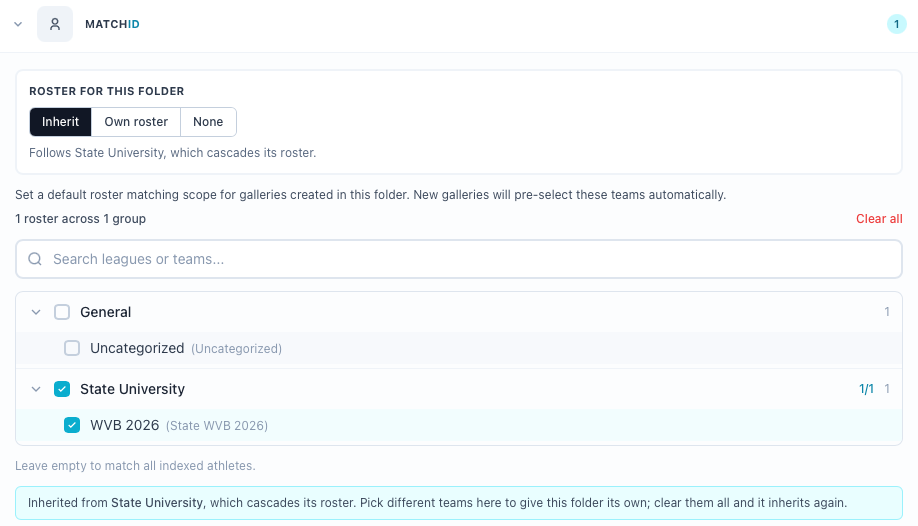
Roster Matching is the most important gallery setting. It controls which athletes appear when tagging people and which athletes are matched during facial recognition. It links a gallery to one or more teams so the person search only returns athletes from the relevant teams.
Setting Roster Matching
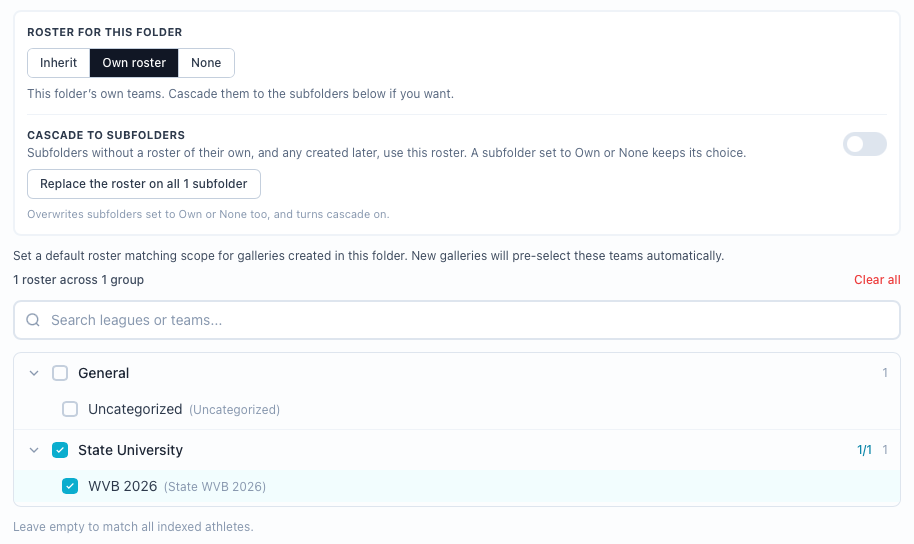
- •Set during gallery creation in the "Roster Matching" section
- •Change anytime by editing the gallery (right-click → Edit)
- •Select a category on the left, then check specific teams on the right
- •You can select teams from multiple categories (e.g., Cal Athletics + MLS)
- •Without a scope, person search returns no results, toggle to "All Indexed" to search your full database
- •A toggle above the search input lets you switch between "Gallery Roster" (scoped) and "All Indexed" (full database)
Upload Links

Generate shareable links that let external users upload photos directly to a gallery , useful when photographers or assistants need to contribute without full account access.
- 1
Open the gallery menu
Right-click a gallery in the sidebar and select "Create Upload Link". - 2
Configure the link
Pick an expiry: Never, or 1, 3, 7, 14, 30 or 90 days. Add a password and a maximum upload count if you want them. - 3
Share the link
Copy the link to your clipboard and send it to the uploader. They can drag-drop or select files without logging in.
People Search
The browser provides two ways to search for people across your photos.
Person Filter (Single Gallery)
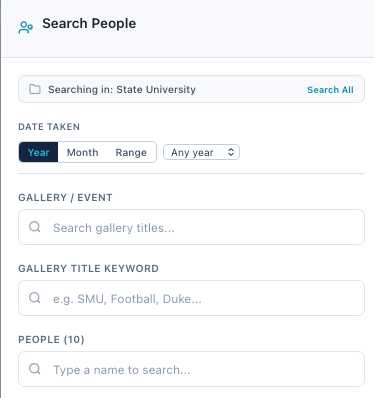
When viewing a gallery, click the person filter button in the toolbar to open a slide-out panel. This extracts each unique person name from the gallery's photos and lets you filter the grid to show only photos containing a specific person.
- •Shows a list of all people found in the current gallery
- •Each person shows the count of photos they appear in
- •Click a name to filter, only photos with that person are shown
- •Filtered navigation carries into the edit modal (arrow keys cycle only filtered photos)
Cross-Gallery People Search
Click the People Search button in the toolbar (available from any view) to search for a person across ALL galleries. Enter a name and the system returns matching photos from each gallery in your account.
Facial Recognition Indexing
When photos are uploaded, facial recognition runs automatically to detect faces and match them against your roster. A status badge in the breadcrumb shows the current indexing state for the selected gallery.
Gallery Processing Status
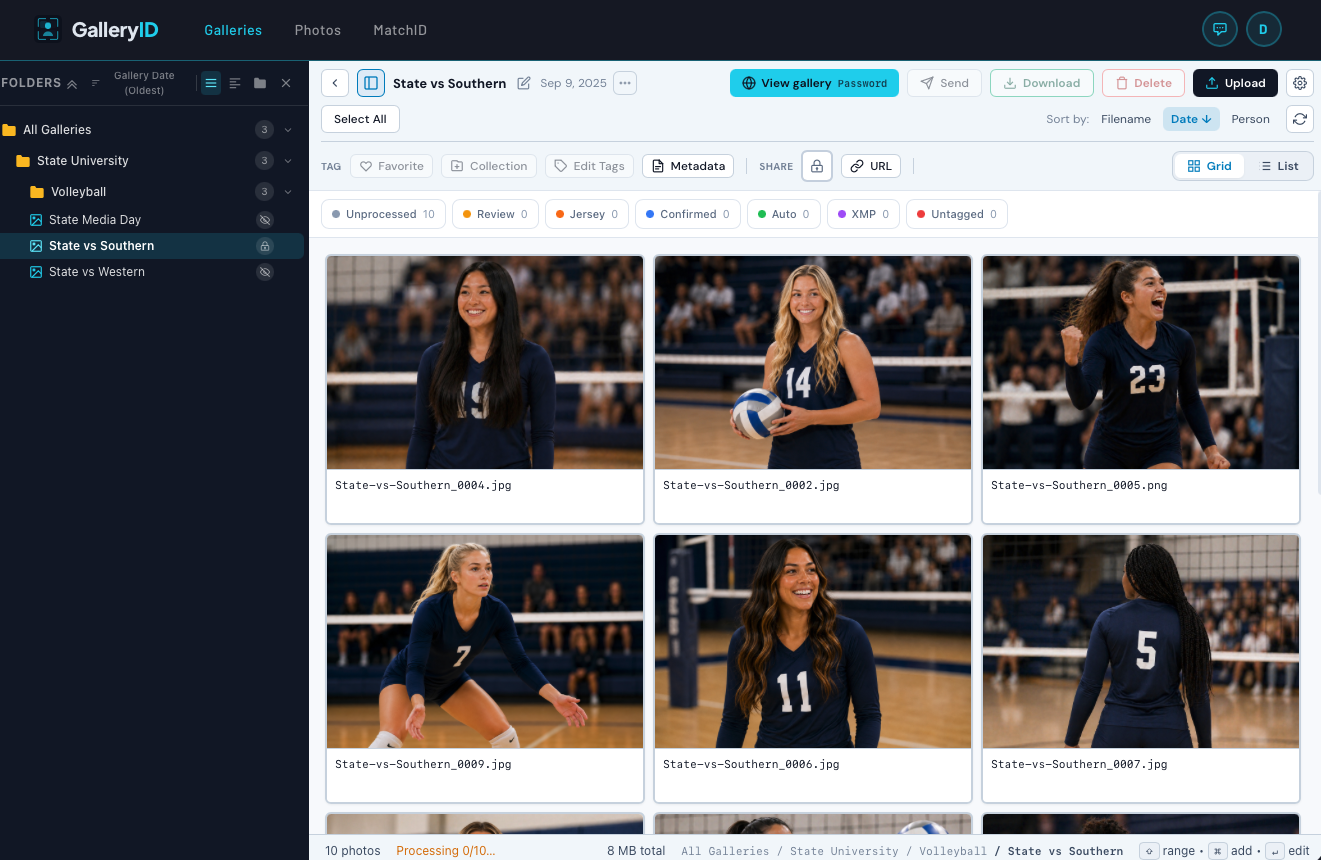
The gallery footer shows the photo count and, beside it, how far face processing has got.
| What you see | Meaning |
|---|---|
| Processing 34/120… | Face processing is running. 34 of 120 photos have been through it so far. The count updates on its own; no need to refresh. |
| 120 indexed | Each photo has been analyzed. It does not mean each photo has a face in it, only that none are still waiting. |
| No processing line | Nothing has been processed for this gallery yet, or recognition is off for it. |
Re-Indexing a Gallery
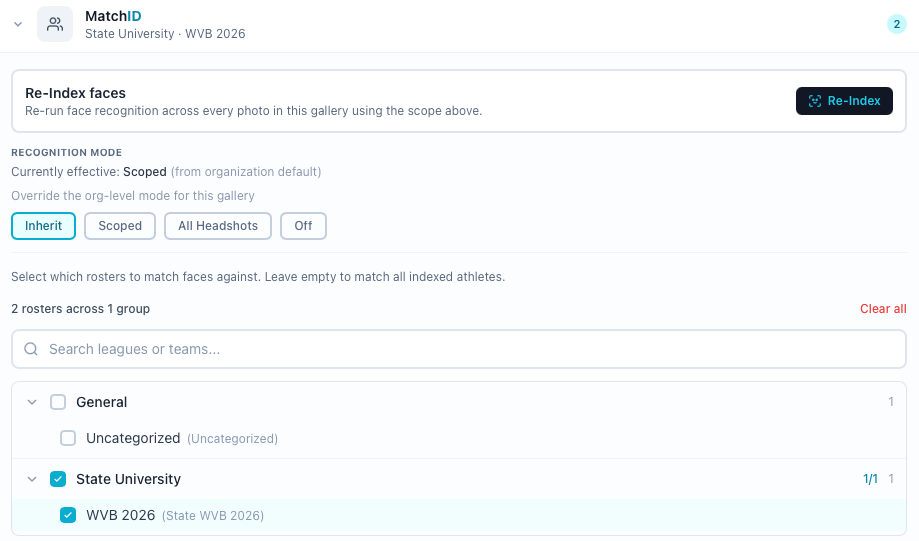

If you add or update roster data after photos have already been processed, you can re-run facial recognition to pick up the new roster information. Useful when you've uploaded fresh headshots or expanded the roster scope.
- 1
Open the gallery
Navigate to the gallery in the Gallery Browser. - 2
Open Settings
Click the Settings cog in the toolbar. - 3
Expand MatchID
Inside the Settings modal, expand the MatchID section. - 4
Click Index Faces or Re-Index
The button reads "Index Faces" if never run, or "Re-Index Faces" if the gallery has been indexed before. Gated on edit_tags. - 5
Confirm
A confirmation dialog shows the number of photos that will be processed. Click to proceed. - 6
Monitor progress
The breadcrumb badge updates in real time. When complete, the final indexed count shows in the footer below the grid.
Sharing Galleries
Share Links
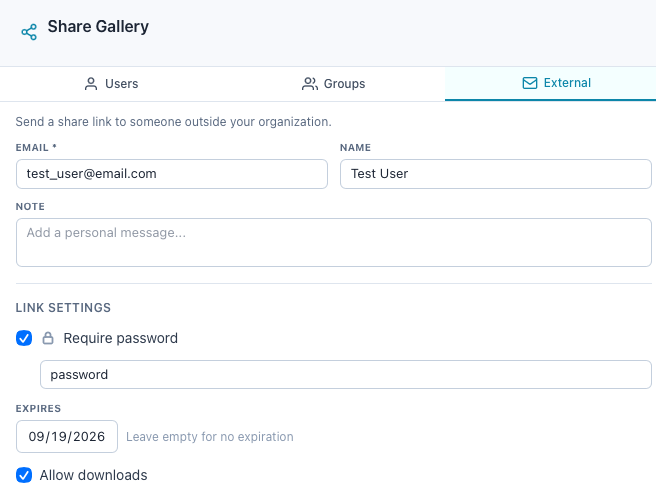
| Visibility | Description |
|---|---|
| Private | Only users with explicit folder access |
| Public | Anyone with the share link |
| Password | Requires a password to view |
A share link can carry a password and an expiry date, and downloads can be allowed or withheld. Each link tracks its own view and download counts.
Reviewing Face Matches
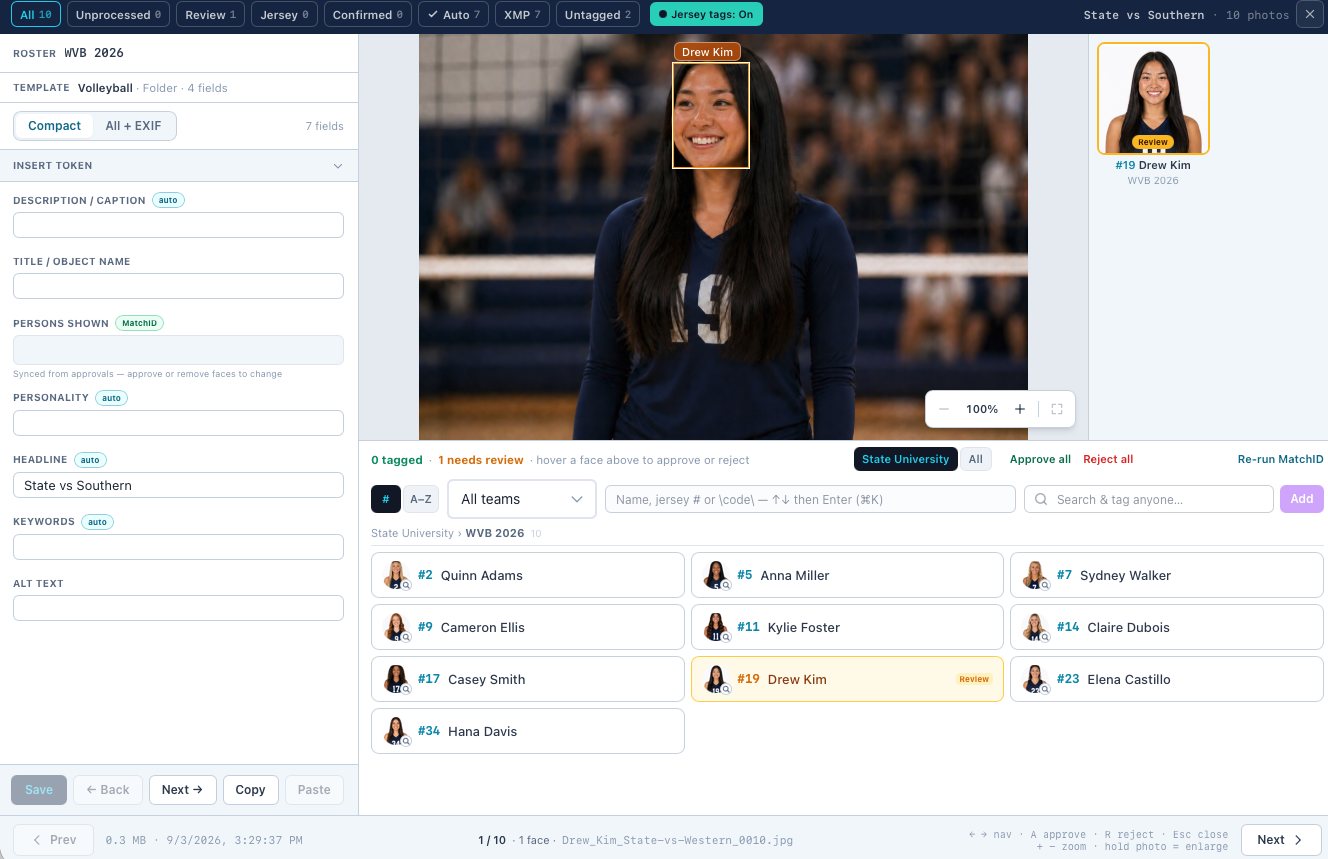
When you open a gallery in the Gallery Browser and click a photo, the Photo Edit modal opens. This is your workspace for reviewing AI facial recognition results, manually tagging people, editing metadata, and managing XMP data. Galleries with pending matches show an amber badge on their card so you can focus on what needs attention first.
Photo Edit Modal
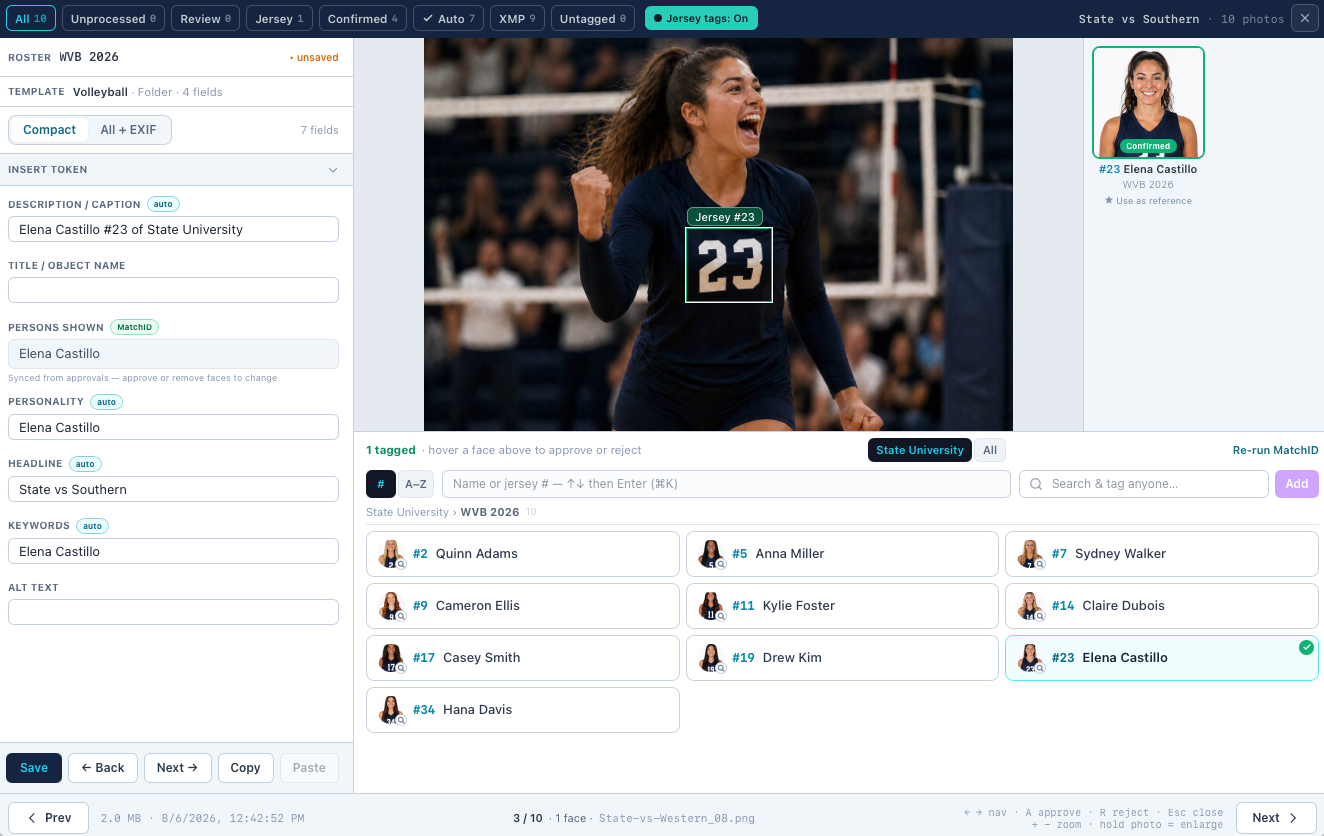
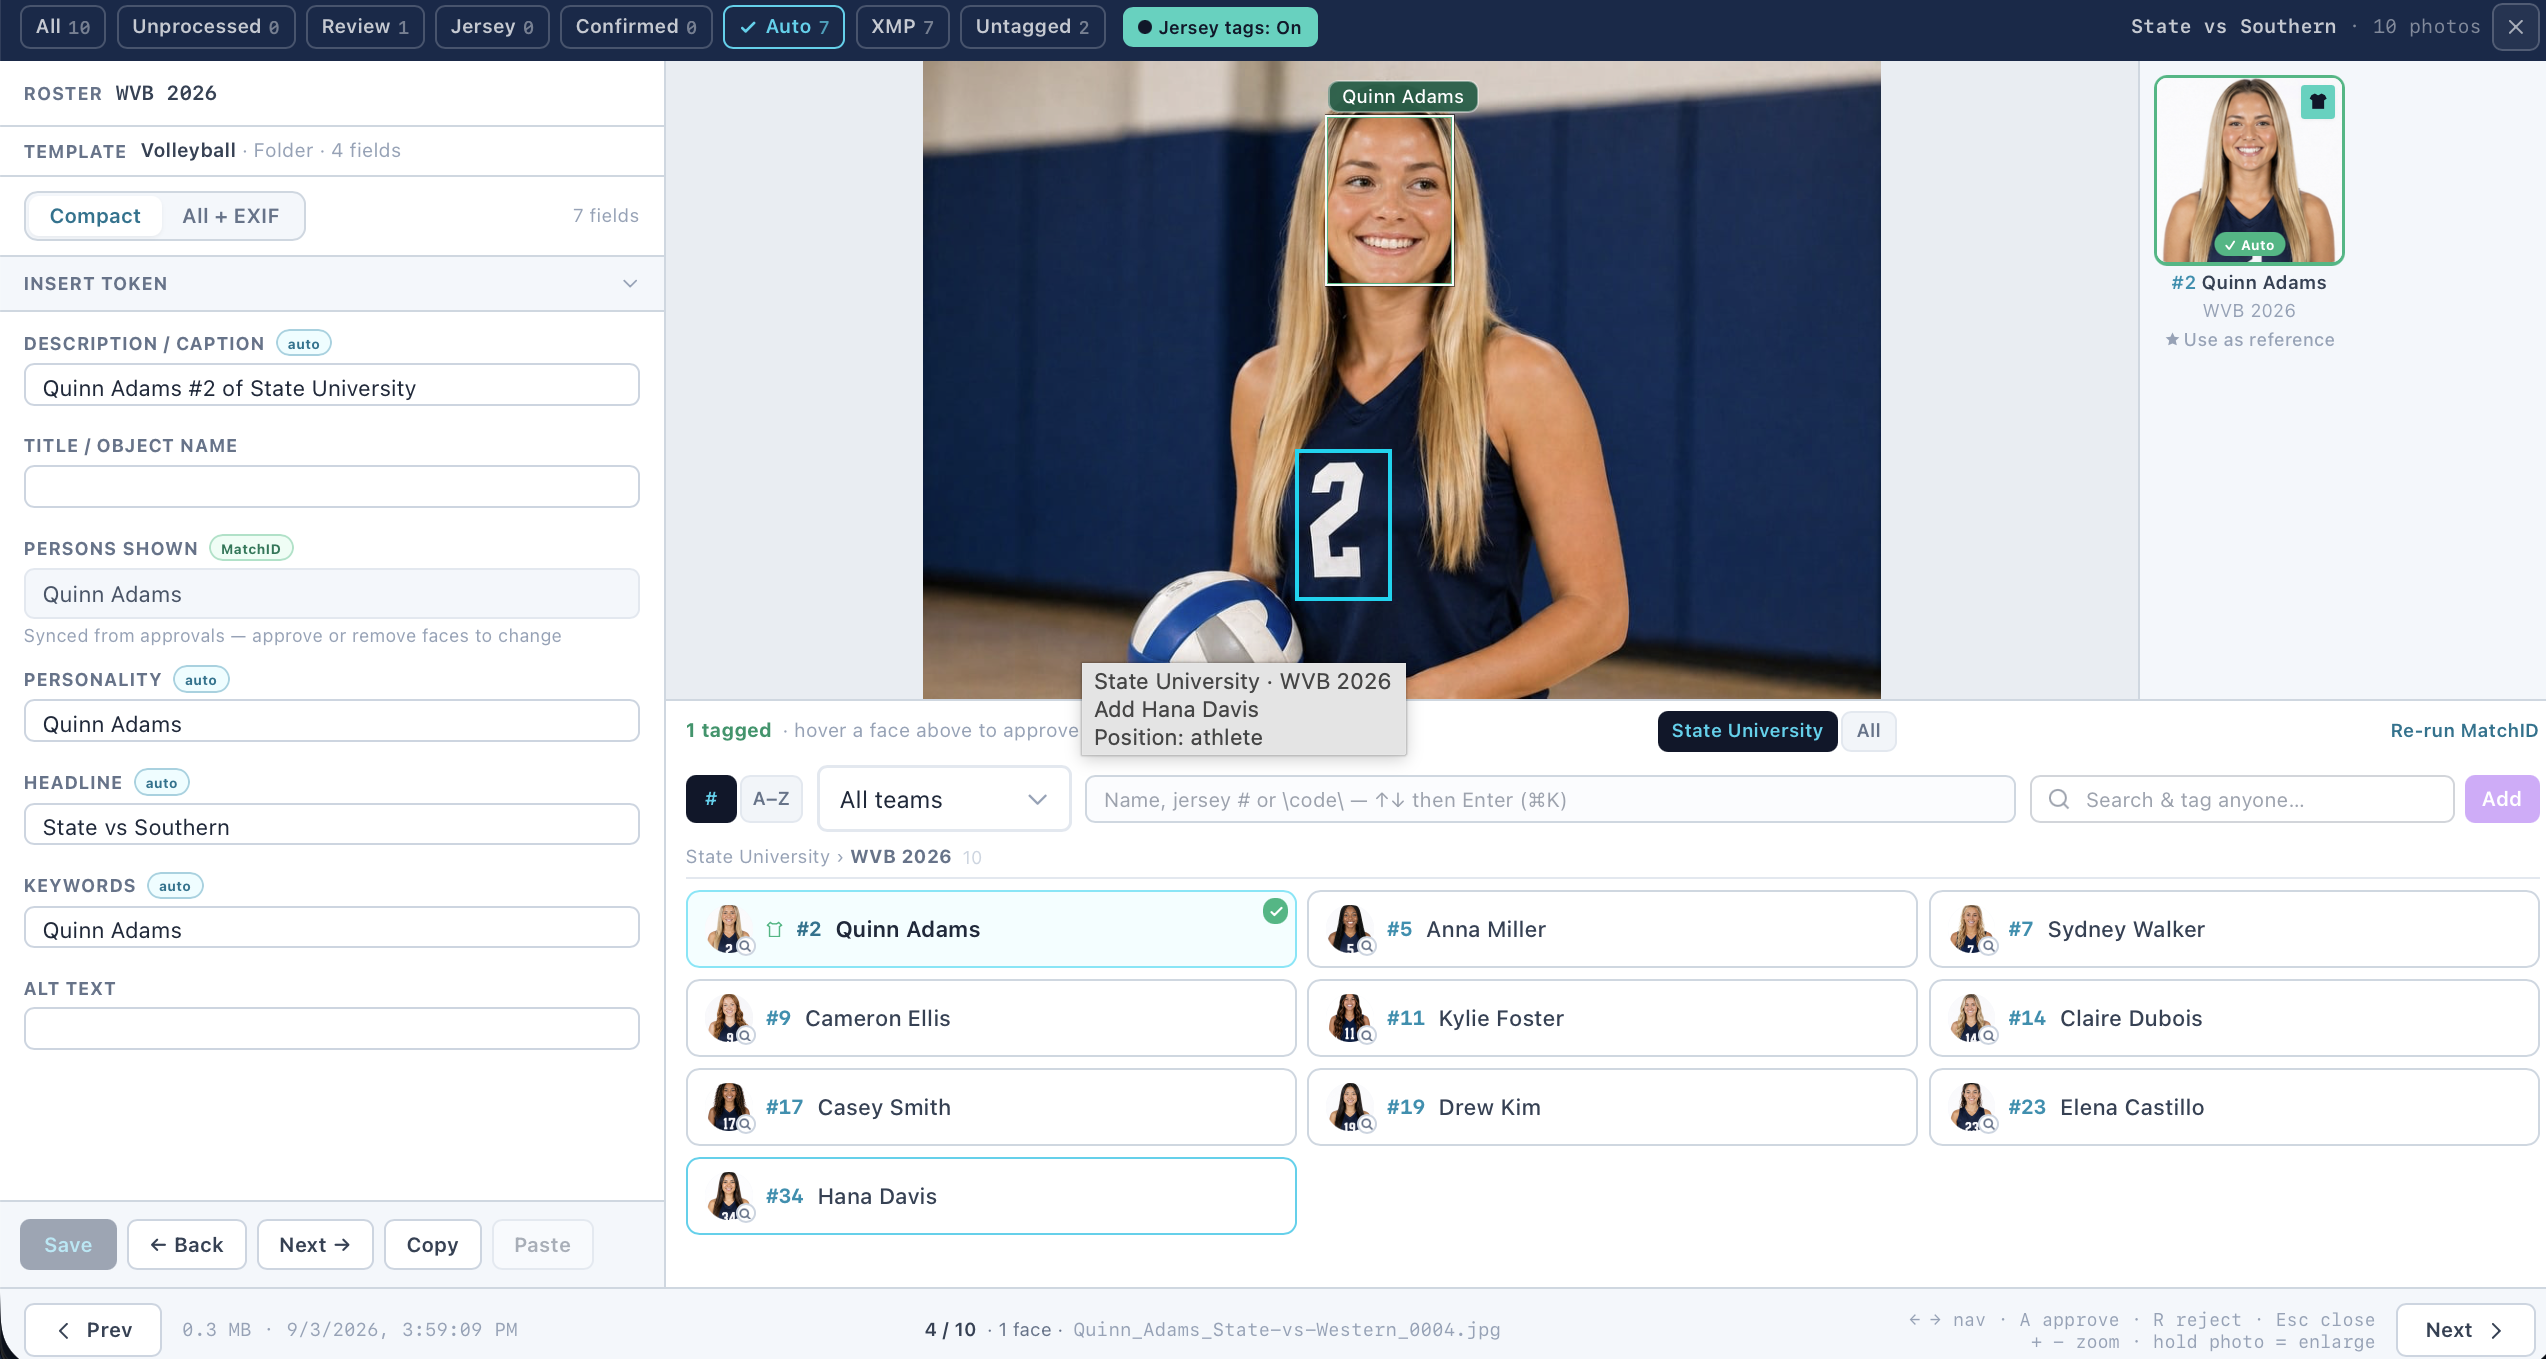
Click any photo in a gallery to open the full-screen edit modal. The left panel shows AI matches, tagged people, manual tag input, and metadata. The right panel shows the photo with face bounding box overlays. Use the arrow buttons or keyboard arrows to navigate between photos without closing the modal.
Match Status
| Status | Badge Color | Meaning |
|---|---|---|
| Pending | Amber | AI found a match, needs human confirmation |
| Approved | Green | Confirmed correct by a reviewer |
| Auto-approved | Blue | High confidence match, approved automatically |
| Rejected | Red | Match was incorrect, person dismissed |
Approve & Reject
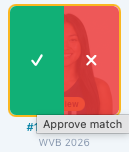
Each pending match appears as a compact two-line row. The first line shows a source badge and the person's name with approve/reject buttons. The second line (when available) shows position, jersey number, team. Click the green checkmark to approve or the red X to reject.
- •Approving adds the person to the photo's XMP tags (xmp_persons)
- •Rejecting removes the match, the person won't be associated with that photo
- •Approved matches move to the Tagged People section as unified tag rows
Batch Actions
For galleries with many matches, use the approve/reject all buttons in the modal footer to process all pending matches on the current photo at once. The gallery toolbar also provides batch operations:
| Action | What It Does |
|---|---|
| Approve All (in modal) | Approve all pending matches on the current photo |
| Reject All (in modal) | Reject all pending matches on the current photo |
| Approve ≥ 95% | Approve only very high confidence MatchID matches across the gallery |
| Approve ≥ 80% | Approve high and medium-high MatchID matches |
| Approve ≥ 60% | Approve most MatchID matches except low confidence |
| Approve all pending | Approve everything regardless of confidence |
| Auto-approve XMP matches | Approve pending matches where the AI name matches the photographer's XMP tag |
| Reject jersey-only | Reject all pending jersey-only matches (number-based, no face similarity) |
| Reject all remaining | Reject all pending matches (use with caution) |
Jersey-Only Matches
Some matches are based solely on jersey number detection (OCR), not face similarity. These appear with distinct visual styling so you can tell them apart from MatchID matches:
| Indicator | Meaning |
|---|---|
| Orange background | This match was made by jersey number only, no face was compared |
| # badge (instead of headshot) | Shows the detected jersey number |
| "Jersey Only" label | Confirms this is a number-based match, not a MatchID match |
| 0% confidence | No face similarity score exists for jersey-only matches |
Adding Reference Photos
While reviewing photos in the edit modal, you may notice a clear shot of an athlete, good lighting, visible face, recognizable angle. You can add that photo directly as a reference to improve future matching, without leaving the review workflow.
How to Add a Reference Photo
- 1
Find a good photo
Look for photos where the athlete's face is clearly visible. Sideline shots, celebration moments, and pre-game warmups work well. - 2
Click "+ Add as Reference Photo"
Below the tag input in the edit modal, click the link. This opens the reference modal. - 3
Select a face
If the photo has multiple detected faces, choose which face to use. Jersey-only detections are automatically filtered out since they don't have usable face data. - 4
Assign to a person
Search by name or jersey number. The system suggests people already tagged in the photo. Select the person this reference should be linked to. - 5
Choose a photo type
Classify the reference, Action, Helmet On, Sideline, Sunglasses, Headshot, or Other. The quick right-click route offers the same list without Headshot; the full panel here is the only place Headshot appears. This helps the system understand what kind of variation this reference adds. - 6
Click "Add Reference"
The photo is saved as a reference and sent to the AI for embedding. Future gallery processing will use this reference for matching.
Best Practices for References
- •Sideline and warmup shots make the best references, clear faces, good lighting, natural angles
- •Helmet-on references noticeably improve football matching (a face that barely registers bare-headed can clear the bar with a helmet reference)
- •Don't reference motion-blurred photos, if you can't see the face clearly, the AI can't either
- •Adding 2–3 diverse references per athlete is usually enough to cover most conditions
- •References are indexed automatically, the status updates from Pending to Indexed shortly after
Manual Tagging
The edit modal includes a search input for manually tagging people. Type a name or jersey number and select from the dropdown, or add a free-text name for someone not in the database.
Searching People
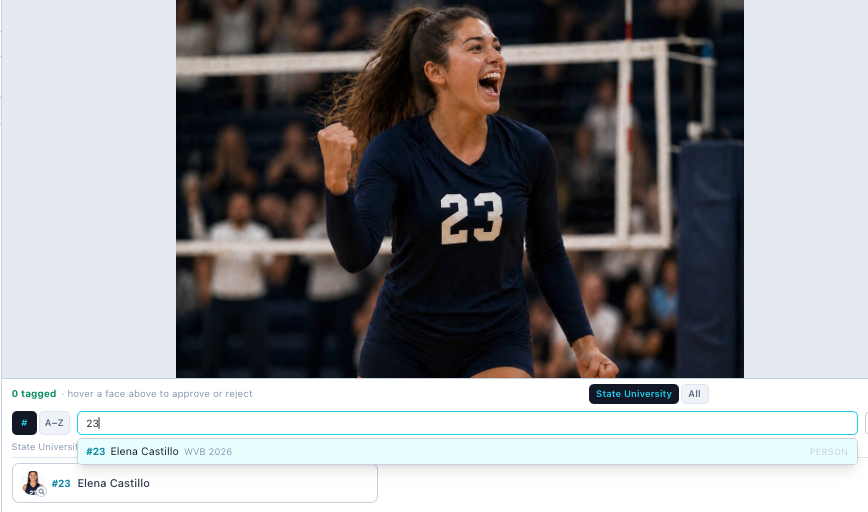

- •Type a name, searches full_name with fuzzy matching (e.g., "Mar" finds "Marcus Rivera")
- •Type a number, auto-detects and searches jersey number with prefix match (e.g., "1" finds #1, #14, #10)
- •Results show headshot thumbnail, name, jersey number, position, and team name
- •Each result shows an "Indexed" (green) badge for athletes with indexed headshots
- •Dropdown is scoped to the gallery's roster matching teams
- •A badge above the results names the set you are searching: the gallery roster, or All Indexed
- •In the photo review window the Roster / All toggle sits on the "N tagged" status line, above the box it controls
Two Types of Tags
| Tag Type | What Happens | Badge Color |
|---|---|---|
| Indexed person | Creates an approved match record + writes to xmp_persons | Green (AI) |
| Free-text name | Writes name to xmp_persons only, no match record | Purple (XMP) |
Tag Rows
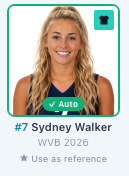
Each tag on a photo shows where it came from. The thumbnail badge tells you at a glance:
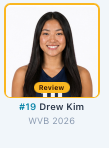
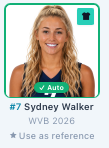
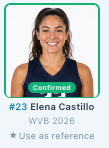
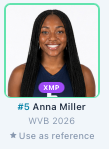
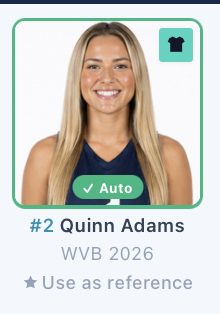
All tags, whether from AI, auto-approval, XMP metadata, or manual entry, display as unified two-line rows. Each row has a colored source badge, the person's name, and a hover-to-show remove button. When detail data is available, a second line shows position, jersey number and team.
| Source Badge | Color | Meaning |
|---|---|---|
| AI | Green | Manually approved MatchID match from AI recognition |
| AUTO | Blue | High-confidence match approved automatically |
| XMP | Purple | From XMP metadata embedded by photographer, or free-text tag |
| M | Sky blue | Manually tagged by a reviewer |
Removing Tags
Hover over any tag row to reveal the x button on the right side. Clicking it removes the name from xmp_persons and, if there's an associated MatchID match, rejects that match.
Editing Photo Metadata
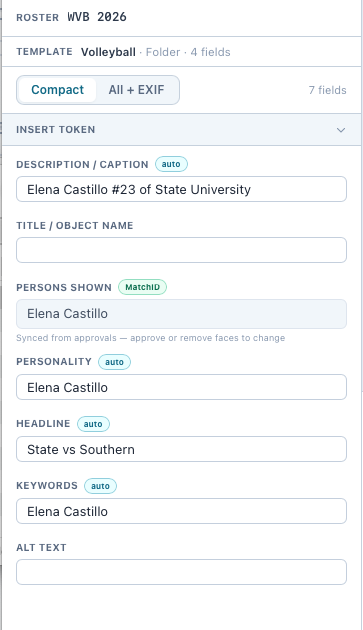
The edit modal includes a collapsible "Metadata" section. Expand it to edit four fields:
| Field | XMP Mapping | Description |
|---|---|---|
| Headline | Xmp.photoshop.Headline | Short description, typically auto-generated from event title |
| Title | Xmp.dc.title | Photo title for cataloging |
| Caption | Xmp.dc.description | Longer description or context for the photo |
| Persons Shown | Xmp.iptc.PersonInImage | Comma-separated names (manual, independent of AI tags) |
Keyboard Shortcuts
| Shortcut | Action |
|---|---|
| Click | Select a photo |
| Shift + Click | Select a range of photos (from last selected to clicked) |
| Ctrl / Cmd + Click | Toggle individual photo selection |
| Double-click | Open photo in lightbox preview |
| Escape | Close the current modal or lightbox |
| Left / Right arrows | Navigate between photos in edit modal or lightbox |
Video Galleries
GalleryID supports video galleries alongside photo galleries. Video galleries are designed for delivering video content to clients, game film, highlight reels, event footage, using the same folder structure, sharing, and download controls as photo galleries.
Creating a Video Gallery
- 1
Create a new gallery
Click "New Gallery" from the toolbar or right-click a folder. - 2
Select Video type
In the new gallery modal, choose the "Video" tab in the gallery type selector at the top. This sets the gallery type and cannot be changed after creation. - 3
Upload videos
Use the upload modal to drag and drop video files. Supported formats include MP4, WEBM, and MOV up to 5GB each.
How Video Galleries Differ
Video galleries look and behave like photo galleries with a few key differences:
- •Sidebar icon: video galleries display a film strip icon instead of the photo icon in the folder panel, making them easy to identify at a glance.
- •Thumbnails: video thumbnails are generated from the first frame of each video. A play button overlay indicates the file is a video.
- •Playback: clicking a video thumbnail in the admin grid plays/pauses inline. In the public gallery view, clicking opens a full lightbox video player with native controls.
- •No facial recognition: the People, Search, and Index buttons are hidden for video galleries. Facial recognition only applies to photo galleries.
- •Context menu: Preview, Review photo, Set as Cover, and Add as Reference are hidden for videos since they are photo-specific features.
- •Downloads: videos download at original quality. The resolution picker shown for photos is not available for video files.
Public Gallery View
The public-facing view for video galleries displays a grid of video thumbnails with play button overlays. Clicking a thumbnail opens a full-screen lightbox with a native video player (play, pause, seek, volume, fullscreen). People filters and the people pills section are hidden. Download behavior follows the same gallery-level settings as photos, if downloads are enabled, visitors can download the original video files.
Related